NEF/CRV Conversion Contest 01
Moderator: Uwe Steinmueller
last updated 01/06/2001
|
| |
| With the Kodak professional cameras and lately with the
D1 the photographers got the possibility to save the photos in a brand specific
RAW format. There is none or rarely any processing done inside the camera.
The advantage is that these RAW formats provide higher color depth (mostly
12 bits), the possibility to do the final image processing on a higher powered
computer and without tight speed requirements. It is quite obvious that
in theory the results can be superior to photos stored in JPG and processed
in the camera. |
| |
|
Still most users of the Nikon D1 probably rarely use the RAW (NEF) file
format. There are a number of reasons:
- RAW files take more space on the CF card or Microdrive
- RAW files take longer to be saved on the storage medium (which limits
the burst rate and number of photos stored in the buffer)
- There is no ready photo out of the camera. So it needs more time and
work in tools like Photoshop to make the best of it. It is more like
scanning then just getting a ready photo
- The software is or was not up to what the users expected
|
| |
| Now not only the D1
provides the NEF RAW files
but also the D30
the CRW
RAW file format. |
| |
 Everything you need to do this test you can get
without buying or owning a D30 or D1. Download the D30 Twain
driver or Bibble/Qimage for the D1 files. See links below.
 |
| |
|
With the D1 being longer in the market there are now a few options to
convert NEF files:
- Nikon Capture ($500)
- Bibble for
PC and Mac ($99)
- Qimage
for PC ($30)
With the D30 there is currently only the Canon Software (but Canon will
provide soon a SDK so that we can expect third party vendors to work on
CRW files hopefully soon, probably Bibble and Qimage among them)
|
| |
|
 Before
you start read the following information: Before
you start read the following information:
|
| |
|
This contest has two goals:
- Provide sample NEF and CRW files for all users to play with and get
into the RAW experience
- Share with other users how to make the best out your raw files. As
said raw files are diamonds in the rough. They have great potential
but one has to work for it and know the tools (I am still learning myself)
|
| |
| The contest photos were not shot with this contest in mind.
They differ in many aspects but I still hope that we all can learn from
this experience (By the way I - Uwe Steinmueller - ran a couple of NEF contests
some months ago) |
| |
| The Photos from Point Reyes Station |
| |
| Nikon D1 |
| |
|
|
| |
|
Photo info:
- Photographer: Uwe Steinmueller 11/05/2000
- Exposure: 1/250 sec - F/16
- Lens: 80-400mm F/4.5-5.6
- Focal Len: 135mm
- Format: 12 bit
- MeterMode:
- Multi-Segment ProgMode:
- Shutter Priority
- ExpBias: 0
- Speed: 200 ISO
- Afmode: AF-S
- Color/BW: COLOR
- Compress: RAW2.7M
- ToneComp: LOW
- WhiteBal CLOUDY
Download as ZIP file
here
|
| |
| Canon EOS D30 |
| |
|
|
| |
|
Photo info:
- Photographer: Gerhard Stappen 11/05/2000
- Shooting Mode Shutter Speed Priority AE Tv
- Shutter Speed 1/180
- Aperture Value 13
- Metering Mode Evaluative Exposure Compensation
- ISO Speed 100
- Lens 28.0 - 135.0mm
- Focal Length 50.0mm
- Image Quality RAW
- White Balance Auto
- AF Mode One-Shot
- AF Focusing Point [ Center ]
Download as ZIP file
here (CRW files have two parts the photo content and a thumbnail containing
the photo information)
|
| |
| The Rules |
| |
- Download any of the RAW files and try to get a result using the available
tools
- Improve it how you like
- Good would be to have the photo in the Adobe RGB color space
- Send the result (JPG 9) to www.outbackphoto.com
including a description of all your steps and your correct name and
email address
- If the name and the description is missing the photo will be ignored
|
| |
| The Results (13) |
| |
| This page will contain up to 15 smaller versions of the
contest submissions and the unprocessed version will be posted
here (including the description). If you click on any photo you get
linked to the larger photo (also click there on the photo again). |
| |
| The first table show a crop of the different submissions.
The number of the photo is displayed if you hold the cursor over the photo
crop (the numbering is form left to right, top to bottom: row1: 1,2,3 row2:
4,5,6,...). Below this table you find a detailed description to each of
these photos. |
| |
| |
|
|
| |
| |
| 01 |

Uwe Steinmueller, D1 photo (Bibble)
|
| |
- Bibble PS plug-in Autolevel 0.05/0.05, tone normal, Exposure Comp
0.0, One click WB on white clouds
- Loaded into PS 6.0
- Levels contrast 1.05
- 16 bit USM in PS (180%, Radius 0.8, Threshold 3)
- Rotated using Edit->Transformation->Rotate
- Cropped
|
| 02 |
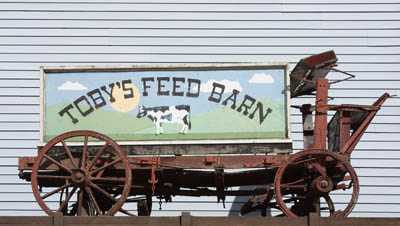
Uwe Steinmueller, D30 photo (Canon D30 Twain)
|
| |
- D30 Twain Driver, Saturation: low, Contrast normal, Sharpness as shot,
One click WB on white clouds
- Loaded into PS 6.0
- 16 bit USM in PS (180%, Radius 0.8, Threshold 3)
- Perspective corrected Edit->Transformation->Perspective
- Cropped
|
| |
| Thanks to Ron Reznick as he tried all three D1 NEF conversion
tools. |
| |
| 03 |
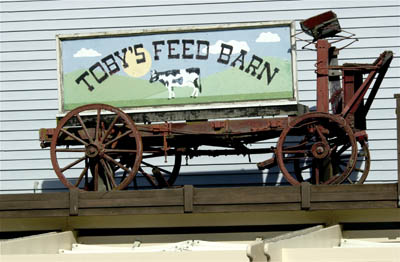
Ron Reznick, D1 photo (Bibble)
|
| |
- Open in Bibble
- Click white on cloud
- Levels RGB: Highlight=60185
- USM 380%, threshold=1 radius=small Gaussian
- Save JPG=94
- Open in PhotoPaint 9
- Levels: Gamma=1.29; RGB 9, 239; Red 3, 255; Green 0,246, Blue 0, 250
- Save JPG compression=5
|
| |
| 04 |
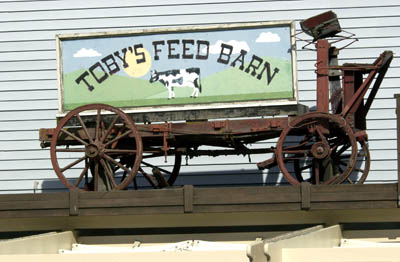
Ron Reznick, D1 photo (Nikon Capture)
|
| |
- Open in Capture
- Curves Red: 5,1.00,210 Curves Green: 0,1.00,211 Curves Blue: 0,1.00,204
- USM 48%, Halo width 6, Threshold 8
- Save Good quality
- Open in PhotoPaint 9
- Levels RGB 6, 255; Red 0, 244; Green 0, 243; Blue 0, 249
- Save JPG compression=5
|
| |
| 05 |
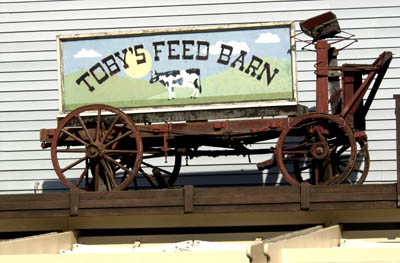
Ron Reznick, D1 photo (Qimage)
|
| |
- Open in Qimage10
- NEF options= Gamma 2.1; USM off, AutoLevel .9; 2.1
- WB: red=6, blue=0
- Saturation red ch.=5
- Save as JPG: 95
- Open in PhotoPaint 9
- Levels RGB 39, 237; Green 0, 246
- Unsharp Mask 210%, radius=1 threshold=2
- Save JPG compression=5
|
| |
| 06 |
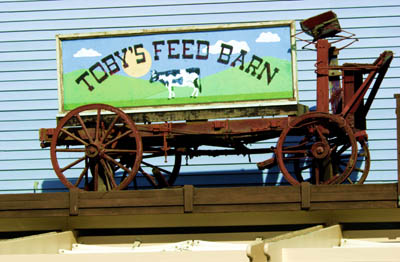
David Wogan, D1 photo (Bibble)
|
| |
- Opened in Bibble, accept all defaults click on OK.
- Loaded in PS 5.5
- Apply Auto Levels Change
- image mode to 8bits per channel
- Duplicate background layer
- On new layer apply image->adjust->hue/saturation
- Increase master saturation to 100%
- Change opacity level of layer to 30%
- Merge the two layers
- Again hue/saturation
- Cyans increased to 20%
- Greens increased to 20%
|
| |
| 07 |
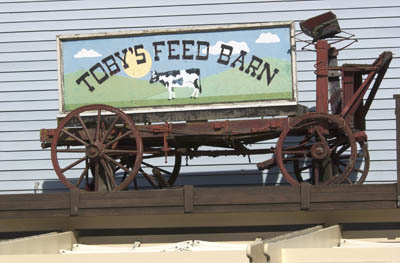
Alan Clifton, D1 photo (Qimage)
|
| |
- Converted using Qimage Pro 10.03
- NEF Image Format set as follows
- Color space: sRGB
- Gamma: 2.0 Contrast enhance: 0
- Saturation enhance: 15
- Unsharp mask - radius: 0 at 0%
- Fringe correction: on Auto level: on Shadow: 0.1 Highlight 0.3%
- Global Filter set as follows:
- Bri/Cont/Sharpen: Brightness: 3, Contrast: 12, Sharpen: 0
- Unsharp mask: Radius: 1, Strength: 175
- White Balance: Red%: 1, Blue%: 5
- All other parameters at their defaults.
- Image converted using the global filter and saved as a BMP.
- Opened in Photoshop 6.0, converted to AdobeRGB and saved as quality
9 JPEG.
|
| |
| 08 |
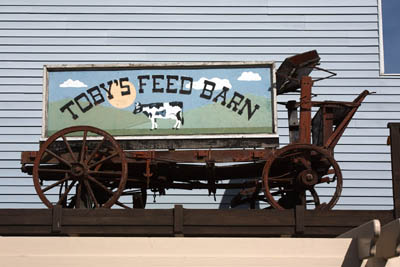
Bill Ehmke, D30 photo (Canon SW)
|
| |
- Linear Twain capture
- WB on Cloud
- Photoshop 6
- Levels, adjust lower level to 143
- Increase master saturation to +30
- USM 260%, 0.6 radius, 0 threshold.
|
| |
| 09 |
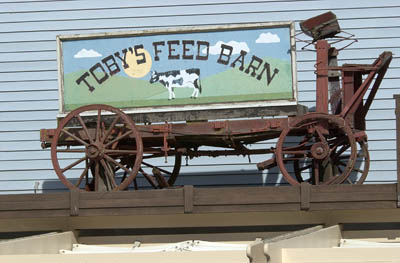
Quan Hua, D1 photo (Qimage)
|
| |
- Use Qimage pro to convert NEF file format to TIF format
- Loaded up in Photoshop 5.5
- Use Level by their individual Channel: (Simply adjust the Output slider
highlight and shadow to the point where it just outside the histogram
signals).
- Red 1-1-207 Green 4-1-198 Blue 1-1-185
- Use Color Balance to your liking.
- I prefered 19-9-0 to bring out the expected rusty brown color of this
picture.
- Converts it to LAB color scheme and selects the lightness Channel
to apply the USM 120-1.5-0 (I do this to reduce the color distortion
with strong USM), then converts it back to RBG. It looks much better
when you magnified it and examine the pixels.
- Save it to JPEG 90% (usually 80% is good enough) but I want to make
sure.
|
| |
| 10 |
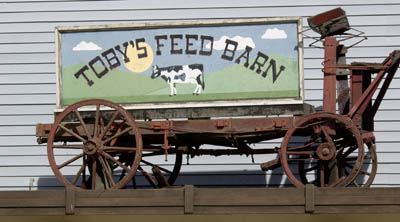
Uwe Steinmueller, D1 photo (Bibble)
|
| |
|
|
| |
| 11 |
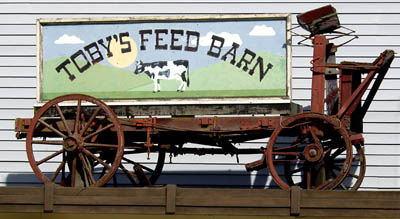
Rick Barletta, D1 photo (Bibble)
|
| |
- D1 Photo with Bibble & PS 5.5
- Bibble= Click White, USM 2-200, save as tif
- PS 5.5= Auto Levels, Auto Contrast, mode 8 bit
- Rotate image 2.25, Random
- crop @ 300 dpi
- adjust color hilight= +3 red and +3 yellow
- adjust saturation master channel +15
- usm 75-2-4
|
| |
| 12 |
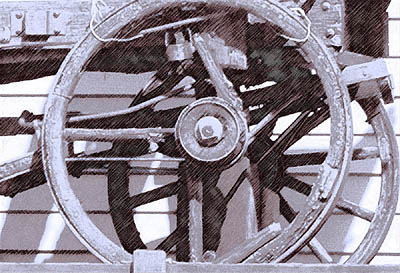
Matt Chroust, D1 photo (Free style)
|
| |
- Open NEF in Bibble w/ presets
- except: White Balance Click White Cow
- -.93 eV, Gamma 3, Tone Normal
- Save as Jpeg 100
- Open in Photoshop 5.5
- rotate canvas clockwise 1.7deg
- crop to front wheels
- lab color
- discard A,B channels keeping L
- levels 0 1.0 222, 3 252
- Grayscale back to RGB
- image size 528x324 increase about 2x using bicubic
- Sharpen
- RGB curves - adjusting R & B to weight shadows red, highlights blue
- layer duplicate
- Foreground layer - filter - "sketch charcoal" @ presets
- Background layer - filter - "film grain" @ presets
- fade foreground to 32%
- flatten
- sharpen-edges
|
| |
| 13 |
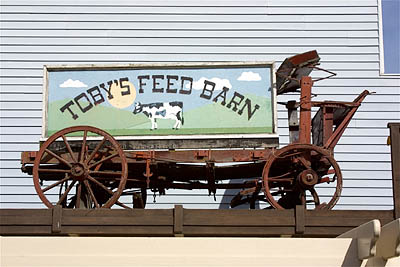
Eric Hyman, D30 (Bibble D30 experimental)
|
| |
- .crw loaded in bibble 2.3X.
- Autolevel defaults
- Tone: Low I
- CC: Srgb
- Ev Comp +.33
- White balance off cloudes
- +30 Saturation
- Process Sharpen
- Save Jpeg 100
|
| |
| |
| |

