Lightroom 1.0:
Tips
Open RAW
files as Smart Objects into Photoshop CS3
This is unfortunately easier on
the Mac because Lightroom does not support drag&drop on Windows.
Having a the RAW files a a Smart
Object in Photoshop allows you to change settings using ACR 4
later.
Here are the steps:
1. Edit RAW file in the LR Develop
module
2. Make sure the XMP data are saved
to disk (either manually in the Library module or by using automatic
XMP update)
3a. Mac: Drag & drop the RAW file
from the Lightroom film strip to Photoshop CS3
ACR 4 will open and you hold the
shift key. This changes the open mode (shows "Open Object" instead
of "Open Image":
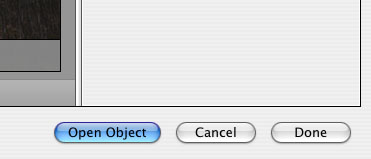
Click on "Open Object" 3b. PC: Open this
RAW file in Photoshop via File->Open as Smart Object
4. You have now a Smart Object
with the original RAW file embedded.
If you want to open most RAW files
as Smart Object then you can set an option in ACR 4.0:
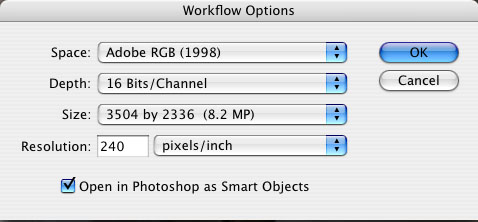
In this case you can use the shift
key if you plan not to open the RAW file as Smart Object.
What about the file sizes (with
and without Smart Object)?
We tried it with a Canon 20D RAW
file:
| |
Size (with normal compression) |
| |
|
| Canon 20D RAW file |
7 MB |
| |
|
| File opened normally in CS3 (no smart Object) |
55 MB |
| |
|
| File opened in CS3 as Smart Object |
75 MB |
| |
|
| |
|
|
For this quite low overhead we will use RAW files
opened as Smart Objects in the future. What are the advantages?
- Smart Objects allow you to export the original RAW file in
the future
- Your TIFF files carry the full RAW files with them including
the settings
- You can export also the settings via ACR 4
- You can modify the settings of the RAW file (e.g. improved
dust spot removal)
TIFFs in Lightroom, ACR 4.0 and Photoshop CS3
The good news with Lightroom and ACR (Camera Raw) 4.0 is that both can also edit TIFF, PSD and JPEG files. But you have to be careful and know the pitfalls.
We only cover TIFF files here but most of it applies PSD and some even to JPEGs. The following assumes that we have enabled in Lightroom "Automatically write changes into XMP":
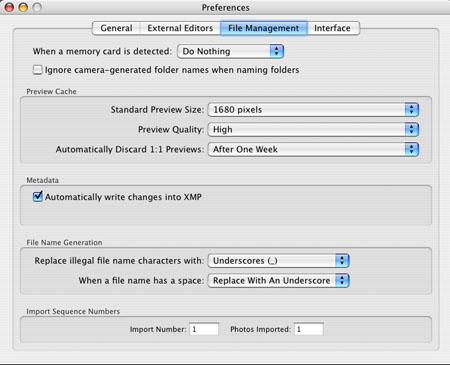
Here we should know that the XMP data (develop settings and metadata) are written into a XMP sidecar file for all RAW files. But for DNG, TIFF, PSD and JPEG these XMP data are part of the file itself.
Working with non-layered TIFFs
First we have to import these TIFF files into Lightroom (or you created them in LR via external editor):
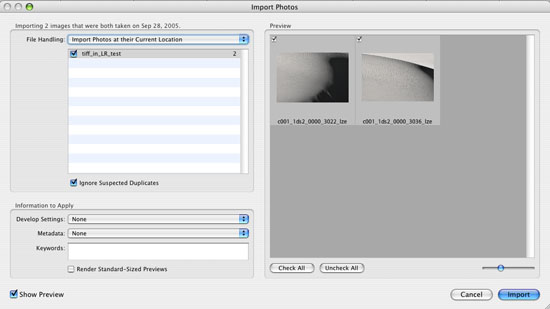
Be careful whether you want to add some default "Develop Settings". If you add any Develop Settings to a TIFF file this will change the interaction with Photoshop CS3 (more below).

No Develop Settings for TIFFs
If you open a TIFF that has not develop settings in Photoshop CS3 it opens as normal TIFF file (like forever).
Now change some develop settings in Lightroom for a TIFF file:
Image shows develop settings
Note: It may take some while (10-20 seconds) until these settings are written to the files XMP section.
Once the XMP data are changed for this file it won't open directly in Photoshop CS3 but instead via the new Camera Raw 4.0:
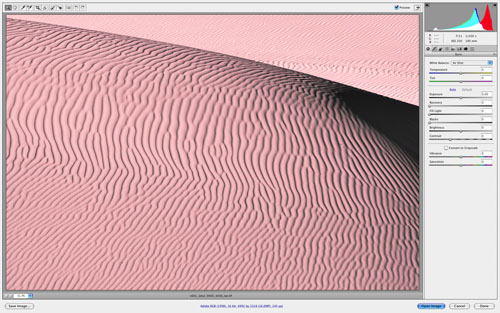
TIFF opens via ACR 4.0
This is perfectly fine if you want the changes in Lightroom to be reflected for this file. If not it gets annoying. It is even more troublesome if you work on many YIFF files in a batch process. The process will then require to open ACR 4.0 for all images that have new XMP develop settings.
Fortunately there is a way to remove these XMP settings in the TIFF files by resetting them in Lightroom:
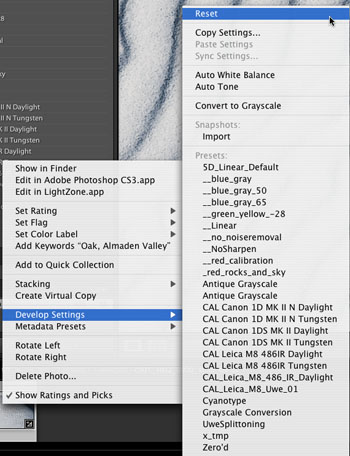
Reset Develop Settings
In the Library Grid mode you can reset a whole set of images. Because of the excellent history mode of Lightroom the old settings are not lost and recorded in the history. But getting back to the previous state would require to handle each image by itself which can be a lot of hassle. Best you plan ahead and know what you want to do with your TIFF files.
Working with layered TIFFs
Here things get a bit more critical. We would avoid to change any Develop settings for layered TIFF files. Saving back XMP data to layered files can corrupt the layer structure of the TIFF file. We has some of these casualties. This is a known bug in LR 1.0 and will be fixed in a next version.
- The file cannot be opened anymore in Photoshop CS3 and your get this error message (it maby only a Mac bug):
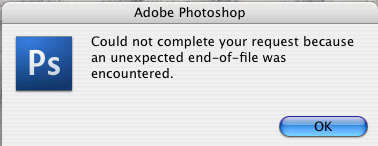
 The good news is that we could recover the flattened version of these files in LightZone at least in some cases. You can also try to open the file in Lightroom with "Edit in Photoshop" but you need to create a copy. The good news is that we could recover the flattened version of these files in LightZone at least in some cases. You can also try to open the file in Lightroom with "Edit in Photoshop" but you need to create a copy.
Watch for XMP conflicts:
More often than we would like to see we get XMP conflicts in Lightroom:
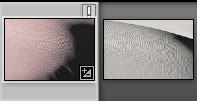
"!" indicates an XMP conflict
This conflict indicates that Lightroom has a different XMP information than the file (e.g. if it was changed by an other application). Click on the "!" and you have two options:

a) Overwrite settings in the file by LR settings. This can cause the above mentioned corruption if you have a layered file.
b) Import XMP from the file on the disk (you lose your LR settings)
In some cases you may not want to risk a) but also not want to lose the changes in LR. We would recommend:
- save the settings as a temporary preset
- get the XMP data from the file
- Create a new TIFF file via "Edit in CS3"
- Apply the save preset data
Sorry this all sounds confusing and it really is. We now mainly use LR for the handling of RAW files and Bridge for TIFFs. With future versions of LR it will be likely less critical.
We are almost certain that we did not cover all corner cases. You feedback is welcome. Best you use our forums.
Read
about the other parts of Lightroom
Part 1: Intro
Part 2: Library
Part 3: Develop
Part 4: Other
Features
Part 5: DOP Lightroom 1.0 FAQ
DOP Lightroom Tips (this page)
|