07/16/2011 Photomatix 4.1 released
- Ability to select a region on the Tone Mapping/Fusion preview and replace it with a source photo. A "Selection Mode" option on the Preview window lets users select one or more regions with lasso tools and replace the selected region with one of the source image(s). "Attach to Edges" button automatically adjusts the selection to follow the nearest edges.
- Improved automatic ghosting reduction: more ghosts removed and less artifacts.
- Addition of Sharpness setting to Fusion/Adjust method.
- Improvements to Fusion/Intensive method: several times faster and better results.
- Option to exclude perspective correction from alignment by matching features.
- Quick Selection" option added on Selective Deghosting tool, so that region is automatically marked as ghosted once selected with the lasso tool.
The new version can be downloaded from here.
Photomatix 3.x is in the market for some time now. So what is the deal with Photomatix 4.0.

Integrated Fusion and Tonemapping
Photomatix supports for a long time Exposure Fusion (also known as Exposure Blending) and HDR Tonemapping. On a conceptual level both methods help to map high dynamic scenes to a low dynamic output (screen or print). Technically these methods work very differently.
Fusion (Exposure Blending)
Manual Fusion by using masks is nearly as old as photography. Exposure Fusion in Photomatix makes the process more simple.
HDR + Tonemapping
HDR is a two step process. First merge images into an HDR 32 bit representation (can be saved as HDR files) and the mapping these HDR images to a low dynamic output (screen or print).
It very much depends on your visual style and also on the images what works for you. In general the images created by Fusion tend to have a more "natural" look (look more like other kind of photographs) while the HDR tonemapped images may easily get the so called HDR or Photomatix look (Grunged in the extremes). Some love this look and others hate it. For us both expressions have their place.
For us the big news in Photomatix 4.0 is that you can explore both Exposure Fusion and Tonemapping after merging the images. This is a major advantage (and as far as I know unique to Photomatix) because you can easily check both methods and see what they do to your images.
The problem with Photomatix 3.x was that you had to decide before the merge which way you wanted to explore.
Here is the new workflow
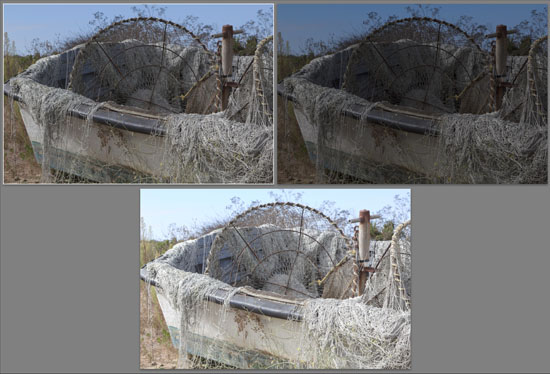
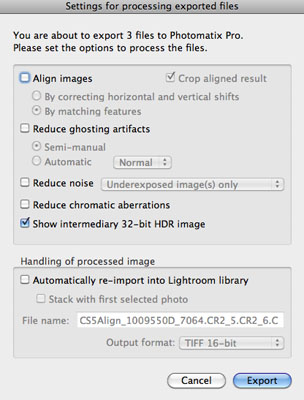
We start with three images in Lightroom (often aligned like this)

3 bracketed Exposures

Our images are already aligned

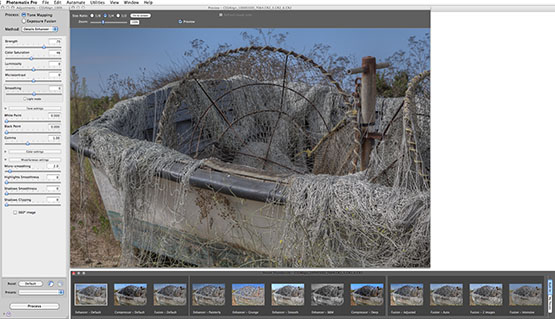
Details Enhancer Method used

Process Tonemapping
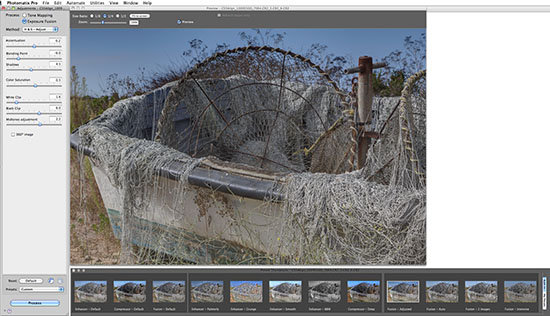
Using Exposure Fusion is now only once click away:

Process Exposure Fusion

Exposure Fusion H&S Adjust
This seems to be a simple thing to do. Remember that the technical processes of Exposure Fusion and HDR Tonemapping are very different. The impact for the workflow is huge because you can explore both Fusion and Tonemapping right away. We recommend you also look into Exposure Fusion more often.
Ghosting Removal
Photomatix adds some improved de-ghosting. We may cover it at a later time but hardly use de-ghosting in our work right now.
Improved Preset Exploration

The small thumbnails give you a first hint how the presets would look if applied to the image. There are now finally also presets for Fusion.
Other Improvements
- Improved noise reduction. We personally remove noise in Lightroom 3 if needed.
- Viewing of tone mapping or fusion settings embedded in processed image.
- Embedding of tone mapping and fusion settings in images saved as JPEG (previously was only when saved as TIFF).
- Ability to tone map a single image in 8 bits/channel mode.
- Faster processing and reduced memory usage for Fusion/Adjust.
Conclusion
For us the integration of Exposure Fusion and HDR Tonemapping makes Photomatix an important update.
|