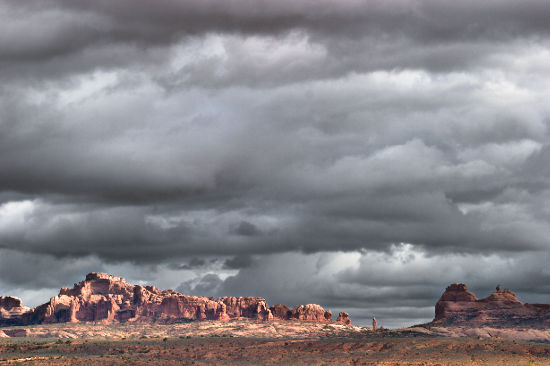
The Canon EOS 10D Arches National Park shot by Bettina
and Uwe Steinmueller never ceases to inspire – a truly stunning
shot of a Western landscape under stormy skies. I first became familiar
with this photograph when it was the topic of an image processing challenge and
a contest on
this website.
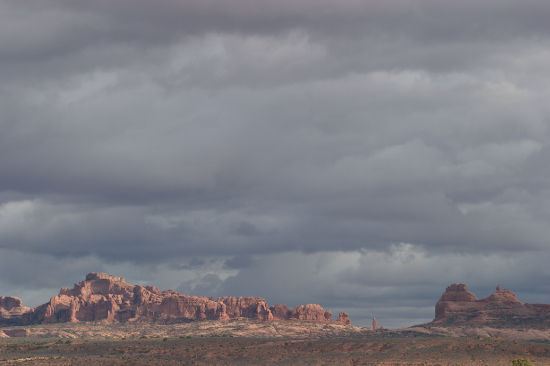
Low-contrast original RAW processed image
My objective in processing
this image is to change it from its low-contrast original into
a dramatic, high-contrast interpretation. I did that before in the
aforementioned
contest, using curves in Photoshop. “Curves” is a fine
tool, but it is hard to use and, if one is not careful, it can produce
image
artifacts and tonality discontinuities. In this article I use LightZone® V1.6 and with mostly one-click tools achieve
the same effect and perhaps surpass it.
The first operation is to increase the global contrast of the image.
I set up a ZoneMapper tool to push the highlights and the shadows
to their respective extremes. The image highlights started on the
4th zone
divider from the top. To avoid highlight clipping, I dragged the
3rd zone divider to the top. On the shadows end, the zone divider
just below
the lowest detected shadow information was dragged to the bottom.
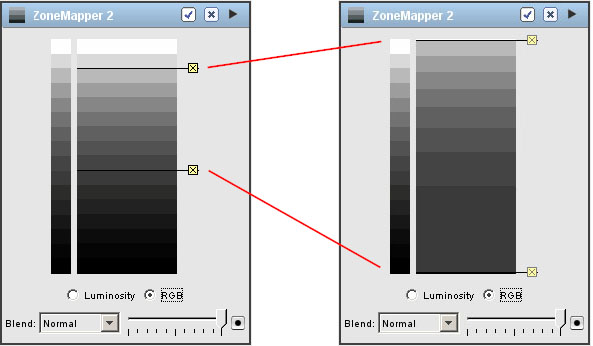
ZoneMapper
global contrast increase
I selected the RGB checkbox
in the ZoneMapper tool, as I preferred the overall color saturation
using this
setting.
The image gained contrast. Next the default settings
of a ToneMapper tool were used, which tamed the image dynamic range
globally
and increased local contrast.
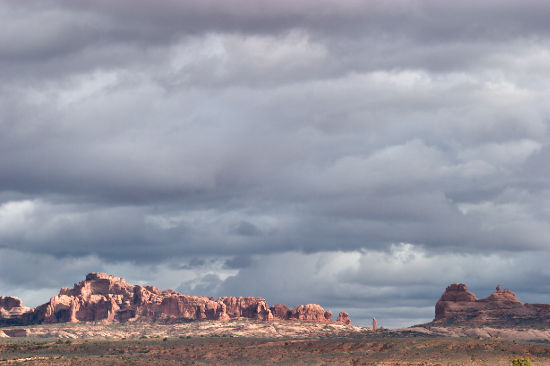
Intermediate image after applying the ToneMapper layer
The image
is close to my visualization of the scene and I could finish
it by layering additional ZoneMappers to extract further
local contrast.
However, for a quicker dramatic result, I took another route.
Opening a Channel Mixer tool, I created a region/mask to isolate
the land
from the sky and applied it inverted (to affect the sky only)
to the Channel
Mixer with its Blend mode switched from Normal to Overlay (to
preserve color). I note that the region is a rough outline
of the terrain
with a large feathering area to eliminate halos, akin to the
dodge/burn technique
of the classic wet darkroom.
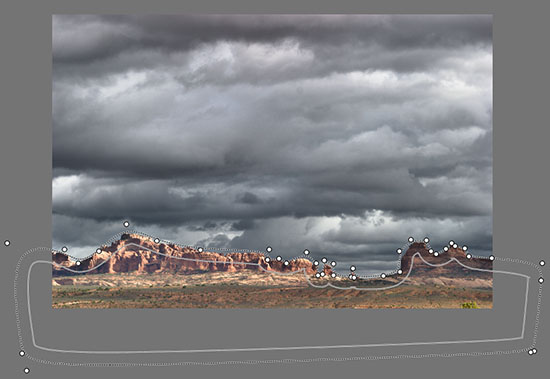
Channel Mixer (Overlay) applied
to an inverted mask
The image was finished with the following layer
adjustments:
- Hue/Saturation layer (Sat +24) applied to the masked
land region
- ZoneMapper layer (also masked) to darken the shadows
in the rocky wall
- Color Cast layer to neutralize the masked sky
(inverted region)
- Clone layer to remove a bush on the lower right
corner
- Sharpen layer (100,1) to the masked land region only.
Note: the same Region/mask
created for the Channel Mixer layer was copied and link-pasted to all subsequent
layers except the Clone
layer.
The final result is the dramatic rendering I was after, and was effortlessly
achieved in a minimal amount of time. In addition, LightZone’s
image processing preserves image integrity and 3-dimensionality.
Final
result: High-contrast, dramatic final image
Note: The author thanks
Bettina and Uwe Steinmueller for the use of their original Arches
photograph and Uwe Steinmueller for insightful image processing comments.
Note by Uwe Steinmueller
Because we did not want to give the RAW file away but still wanted
our readers to experience the full editing process themselves in LightZone
(download a demo or buy at discount from this site) we created an unprocessed
full resolution JPEG and added Antonio's LZN file (download
from here). |


