We have reviewed LightZone before
and found it a very innovative image editing application. Yes you can
perform your whole workflow in LightZone but we find it even more valuable
for the final fine tuning of our images.
We use most of the time a workflow that we have shown
here. This often brings us to the final version of
our image. But if we would look closely there is nearly always
some room to perfect the photo by using local dodge & burn techniques.
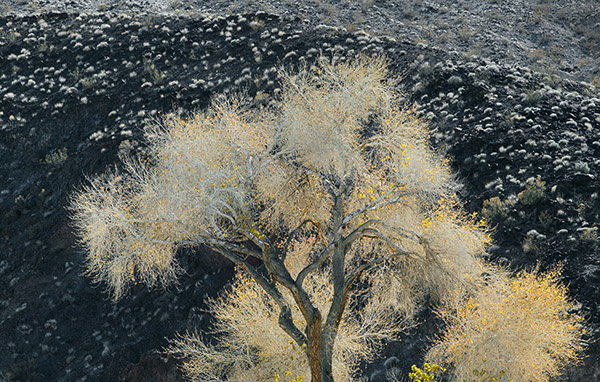
Here is one of those images that we considered quite nice actually:
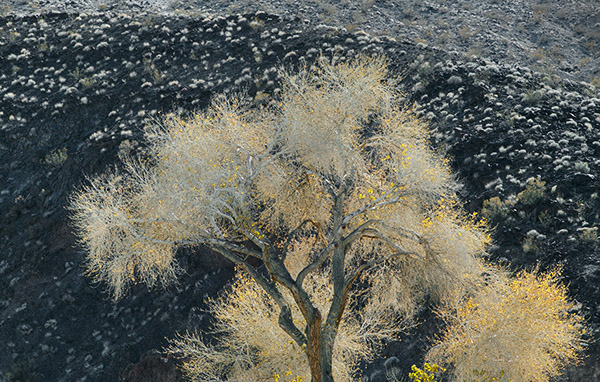
Cotton Wood in Death Valley
We thought that we may take the sparkle of the tree a
bit further without brightening the brighter parts of of the rest of
the image. Reaching this goal in LightZone is easy and fun.
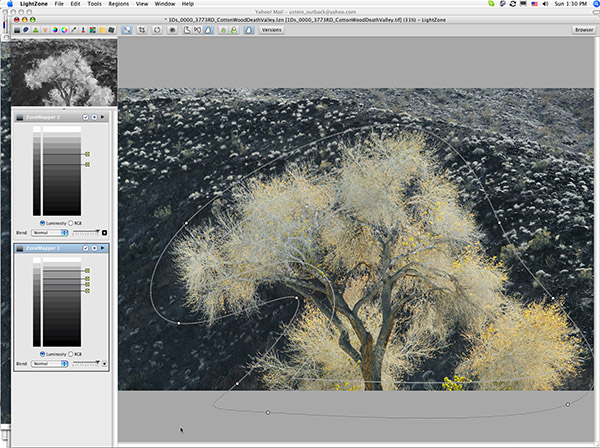
LightZone with a region selected
With only a few control points we created
a region in LightZone and allowed a wide feather range to avoid harsh
transitions.
The following ZoneMapper brightens the
tree branches and leaves:
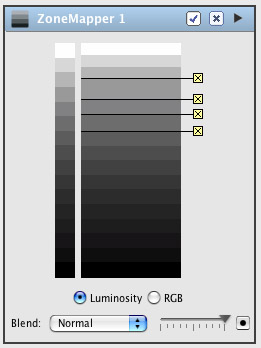
ZoneMapper 1
The lower control point helps to protect
all the darker tones
of the image from changes. Finding this control point is easy using
LightZone's unique ZoneFinder. The other control points tune the brightness/contrast
of
the branches
and
leaves.
This works fine and got us thinking to
also darken the surrounding volcanic soil.
Here a powerful feature of LightZone
comes in handy. You can copy a region from one ZoneMapper to a different
one and even link them. This means if you change the region it will
be changed for both ZoneMappers. As said we wanted to darken the area
that does
not include the tree. Lightzone tools allow to use either the defined
regions or the inverse areas which we used in the second ZoneMapper
(see the red circle):
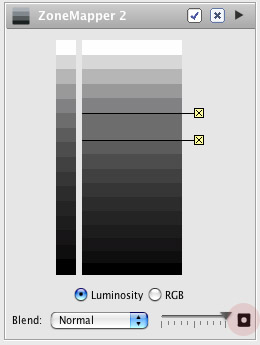
ZoneMapper 2
This time we protect the brighter tones
and darken a bit the darker midtones and shadow. Here is our resulting
photo:
After

Before

crop after

crop before
We show the crops because the changes
are subtle but still very important.
Workflow
- Create in Photoshop a 16 bit TIFF file with all the global corrections
you need to get a good good image (consult
this workflow again as example)
- Flatten the file (or at least have no alpha channel in the TIFF
files as right now LightZone won't read TIFFs with alpha channels
- will be fixed hopefully soon)
- Save result as 16 bit TIFF
- Open in LightZone
- Tune the image in LightZone
- Save result as LightZone LZN file
- Export to a 16 bit TIFF with a different name
- Open this TIFF in Photoshop
- Place this file as a new layer on top of the original layers (we
wrote a little helper action for this)
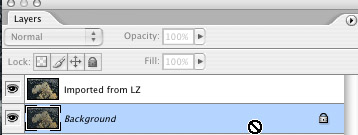
Sample Layer Stack
Conclusion
LightZone is one of the finest tools on the market to
perform tonal corrections for selected areas. LightZone is close to
the logic of classic dodge/burn in the traditional darkroom.
While Photoshop allows optimal dodge/burn control via
powerful painting techniques LightZone provides as top class tonal
correction via ZoneMapper and regions.
Try LightZone on some of your images that you thought
are already perfect and experience how selective tone corrections can
even improve those images in most cases.
|