Once in a while we come across a new plugin that
solves a common problem in a new (at least new to us), easy and more
powerful
way. When we work with the CS2 Lens Correction filter and other specialized
perspective correction filters we realize some distortion artifacts
but never took the time to check into the "why?" (sorry but
life is too short :-) ).
Altostorm
Rectilinear Panorama (ARP) is a new way to solve all
kinds of lens distortions. This tool actually is aware of all the
issues
and
solves quite a few of them. As the name of the plugin indicates this
tool is thought to even correct the very strong distortions you
get from panoramic images.
Lets have a look at a sample session and see how this tool works.
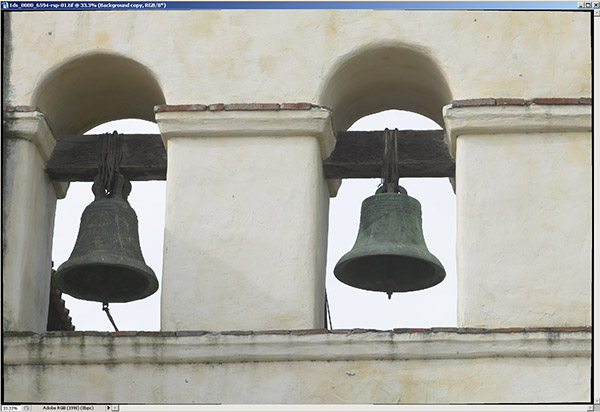
Distorted photo
The typical lens distortions were already
removed using PTLens but
it could also been done with ARP. We used PTLens because in the image
it is hard to see what is a lens distortion and what are crooked lines
from the real object (and our images have often this issue because
we love old buildings). Here is the first screen of ARP.
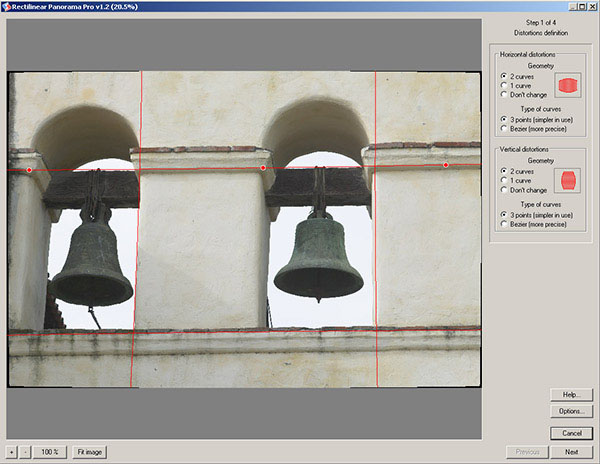
First (out of four) step screen

Zoom options
ARP is capable to display a full screen sized
preview which is a must for serious work (some operations get slower
though, but very reasonable).
Step 1
With the first step you use curves to define the distortions: 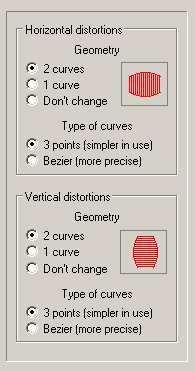
Step 1 controls
We use two vertical and two horizontal curves which define
the perspective and the curvature of the distortions. There are two
modes for the curves:
- 3 points (easy to use)
- Bezier (more precise)
You then define the curves for horizontal (top, bottom) and vertical
(left, right). Normally you follow lines that should be straight
(horizontal or vertical) in the final image.
Step 2
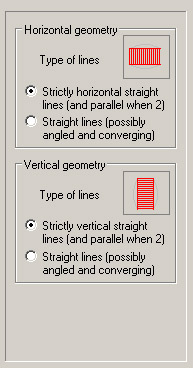
Step 2 options
In most cases you want to use the first
options (we did not actually use the second ones). Read more on their
web page.
Step 3
At step 3 the plugin renders a preview.
If you don't like the result you can actually go back to step #1 without
leaving the plugin. 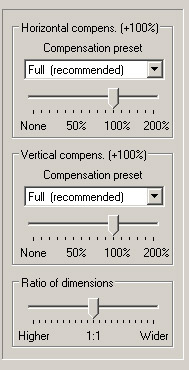
Step 3 controls
I never have seen panoramic tools that
had these 3 controls. You all have probably seen that you easily can
create corrected images that are too wide or to high. The "Ratio of
dimensions" control let you fix this. The other two compensation settings
are more complex (best you read the samples on Altostorm's web site).
It can happen that elements from the foreground get larger rendered
than same sized objects that are further away from the camera. On the
corrected image both objects should get the same size. Here you
can use the compensation sliders to correct this behavior. Very powerful
indeed.
Step 4
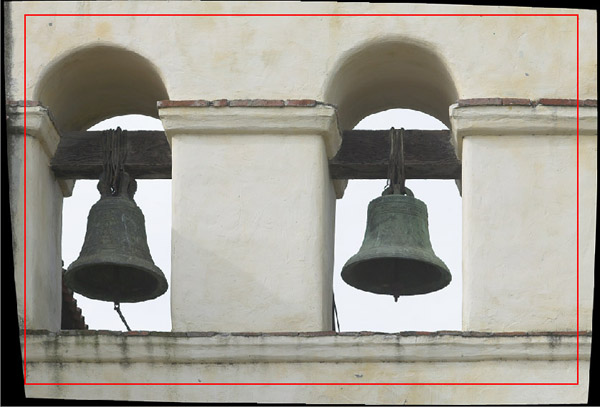
Step 4 crop

Step 4 options
In step 4 you can define a crop. Then
either save to the current layer or to a new file.
Here is the final image (not finally
cropped in PS):
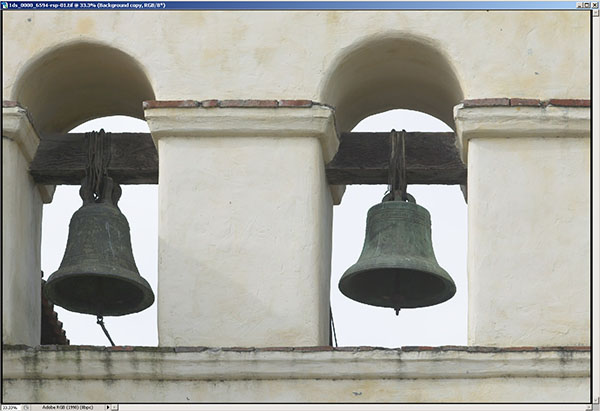
Final image
The Pro version supports full 16bit.
The
Pro version costs $179 and cannot be called cheap. But we have to
keep in mind that these are very specialized
tools which are sold in low volume. Overall this is an amazing and
easy to use tool. ARP is now clearly our perspective correction tool
of choice. What we like to see improved:
- Save/restore of settings (planned)
- Improved crop control (planned)
- A way to make the curve a straight line because in images like
our sample there are no real straight lines and this means we may
define distortions that do not exist. With straight lines we
can just define the perspective fast.
- In step 3 we want a preview of the original image
Highly Recommended
Note: We not only review tools but also work with
many manufacturers to improve these tools. Most of them listen and
respond to our feedback. For every page we write we spend many hours
to work with real world images.
Buy our books/filters to support our work.
You benefit directly and indirectly in more ways than you may think.
Pro version till February 2006 20%
off for Outback Photo readers.
|