In February we published the first
preview of RawShooter essentials (RSE). This was/is
a quite powerful and also free RAW converter. It was clear
from the beginning that RSE is just a first version on the
way for Pixmantec to produce their first and hopefully improved
commercial product. Even as Pixmantec never really announced
when they plan to release this first advanced product
those who liked to use RSE were getting inpatient to know what
would be in the new version and when they can buy it.
RawShooter premium 2006 (RSP)
The
wait is now over as we publish here an exclusive first preview
of the new product (based on our beta version).
At a first glance there seems not that much new in RSP compared
to RSE. This means also that RSP is a true extension of RSE.
This preview hopefully shows that RSP is not just a minor upgrade
to RSE. Nearly everything we said about RSE is also true for
RSP. If you are new to RSE/RSP we encourage you to read our full
RSE review (see also the latest
issue of Fotoespresso 3/2005) because we will only
cover the main differences in this preview.
More Cameras
RSP supports many new cameras like:
Canon 5D, 1D Mk. II N, Nikon D50 and the Leica DMR. Check the
readme for
more detailed info.
The RSP "Tonality Center" While
RSE had these minimal yet powerful four sliders to control tonality
quite a few users wanted more control through Levels
and Curves (us included for lower contrast images).
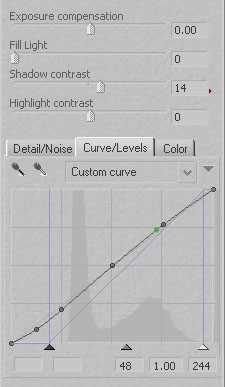
RSP tonality controls
RSP keeps the powerful four sliders
and adds Levels/Curves. We find this a very powerful way to control
tonality (although also quite a bit more complex). Especially
important is that all controls are closely grouped together which
makes the use a lot of fun. B&W photographers will find
the control in tonality very helpful too.
 
The
user can save custom curves and have them available for later
use.
Additional Color Controls
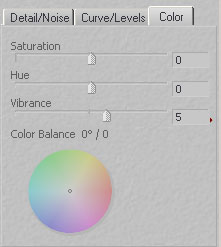
RSP adds two new controls Vibrance and Color
Balance. The Color Balance allows to create/remove
certain color casts (globally). Many users (us included) will
find the Vibrance tool more exciting. It actually
does what the name says: Create more/less vibrant colors. We
were never a friend of the classic Photoshop Hue/Saturation
tool but this tool may be more to our liking. Also toning down
Vibrance can be very useful. Here is a sample:
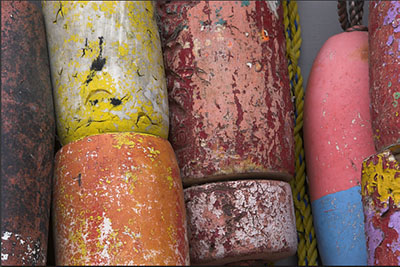
Vibrance 0
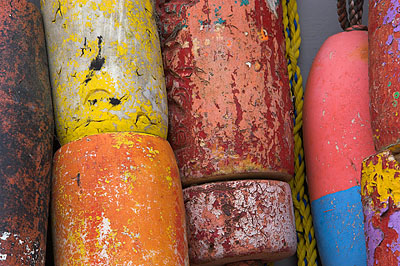
Vibrance 10
Best you check it yourself (free
15 day trial version is available) and experience that it works
very differently from the classic saturation.
Additional Noise Tool
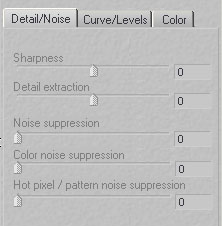
The Hot pixel and
Pattern noise removal is more useful for longer
exposures and consumer cameras. We did not find a picture to
test it with.
Custom Appearances
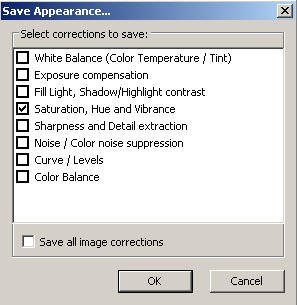
The RSP user now can store custom
settings (all settings or subset) and recall them later at any
time. Crop, Straighten and Resizing
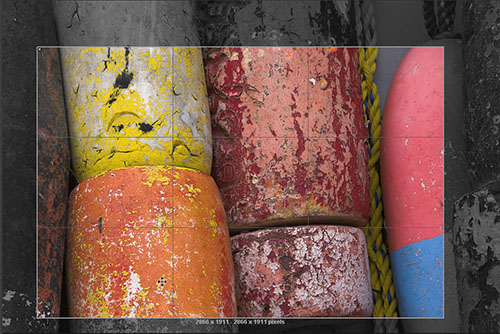
Crop
This is a classic and nice crop
tool.
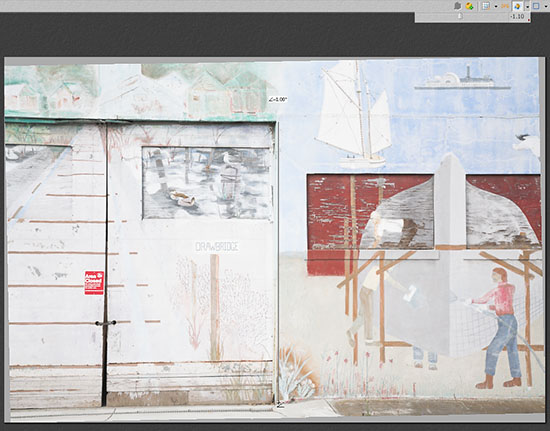
Straighten Tool
Straighten works in two modes:
- Drawing a horizontal or vertical line
- Selecting an angle (slider or numerical values)
We like especially that we can first use the drawing tool and
then fine tune the numerical values. We personally would like
to see a grid (selectable raster) to aid the user.

You can now also upsize/downsize in RSP. We did
not yet check the quality of the results because we hardly upsize
in the RAW converter.
Image Comparison
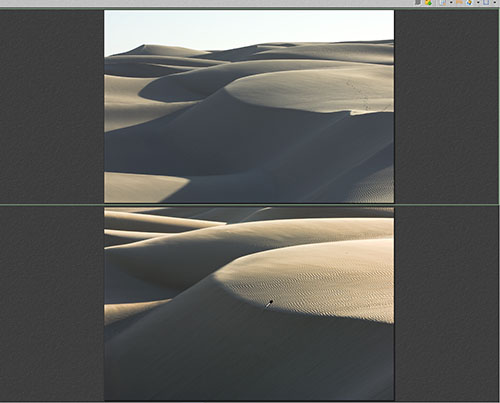
Image Comparison Feature
RSP allows to compare up to 4 images (depending
on a preference setting). The screen can be split vertically or
horizontally. We can think auf many situations where we want
to compare at least two images to match them or find a winner picture.
As of now the images you compare have to be in the same folder.
Image Downloader
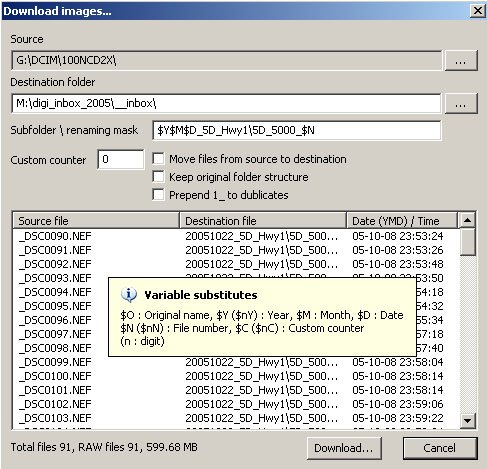
RSP Image Downloader
First we thought "oh there is one more image downloader".
You get these days one with every editing tool on the planet.
We spend
half of our life disabling them :-). Actually the renaming
functionality of the RSP downloader is
probably not a match for other more advanced downloaders. But
then we got excited as this is a downloader that is tightly integrated
into RSP.
We often download 200-400 pictures from a 4GB card
and find that even the fast preview generation of RSE/RSP takes
its time. This means after the waiting for the download we wait
to
have the previews created. The RSP Downloader creates the previews
during the download. This means you can already start working
on your first images while the rest is downloaded. We find this
a
very
strong
feature as we can save real time using the RSP downloader.
Right now the RSP Downloader does not support to
add IPTC data but we hope future versions will deal with this
too. Improved Snapshot functionality

Snapshot Names
You can now give your snapshots
meaningful names. There is also a feature that the snapshot name
will be included into the name of the converted file.
Magnifier
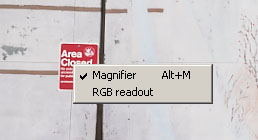
Select Magnifier on right click
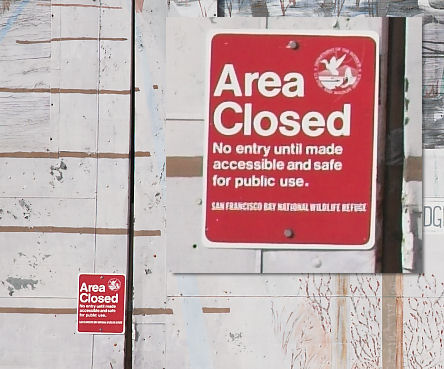
Working with the magnifier
This is a very nice feature
to inspect files for sharpness, focus, details or noise without
even the need to zoom into the file.
What is more?
Bulk Rename 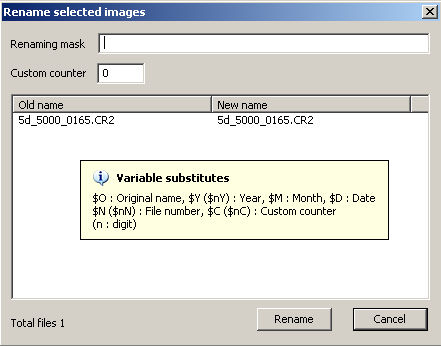
Bulk Rename
FastProofs 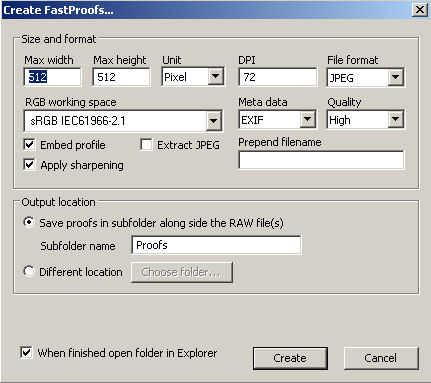
FastProofs
FastProofs are especially useful
for all photographers that want to get some proof JPGs out of
the door. We tried it and it is really very fast. If you then
use Qimage or the Photoshop Proofsheet feature you have proofs
printed in no time (the printer is mainly your bottleneck here).
New Thumbnail display options

Display thumbnails with info

Display thumbnail lists
Conclusion
With all it's new features:
- Curves/Levels
- Dowloader
- Vibrance
- Named snapshots
- Image comparison
- Straighten and Crop
- FastProofs
- New camera support
and the already excellent image quality of RSE we think that
RSP is a bargain RAW converter ($59 is the introductory price).
Does RSP do all we want? Of course
we hope that RSP can improve in some areas with future versions.
We would like to see support for:
- Perspective corrections
- Dust removal
- IPTC support
- Selective color corrections
- "Always perfect images" :-)
- of course we would like it on the Mac too (not likely though,
maybe in the future MacIntel can run Windows apps fast enough)
RSP was worth the wait and improves
on the excellent RSE in many areas: test it yourself and upgrade
now. Highly Recommended
2005/11/19 How to use the RSP
Color engine
There seemed to be some confusion
on how to use the RSP Color Engine. We will try to explain what
to do.
1. You install the Color Engine
(like any other application)
2. You also install the license
key when asked
3. Start RSP as normal
4. Now you can select camera profiles
from the "Batch convert" tab
Let's assume you have selected
an image from the Canon 5D (same for other Nikon and Canon cameras):
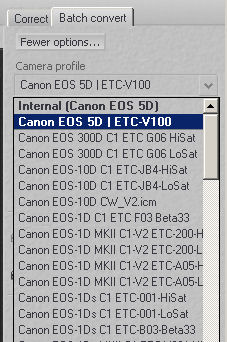
The "Camera Profile" drop down
list shows two sections:
- Bold: Internal and an alternative
profile from the Color
Engine (CE). Internal is the profile that comes with
RSP and the second profile is from the Color Engine. You will
only
be able to see the CE profile for your camera. All other profiles
would be only color gambling anyhow.
- Not bold: Shows all the profiles that maybe
valid camera profiles. Only use profiles that you know are
made for RSP and not just play with them.
Once you selected a profile for your camera this selection is
fix until you select a new one. This means this profile is used
for all the images with the same camera. If you want to use profiles
on an image by images basis you need to do the following:
- select the image
- select the profile
- convert the image
and use the same process for the next image. |