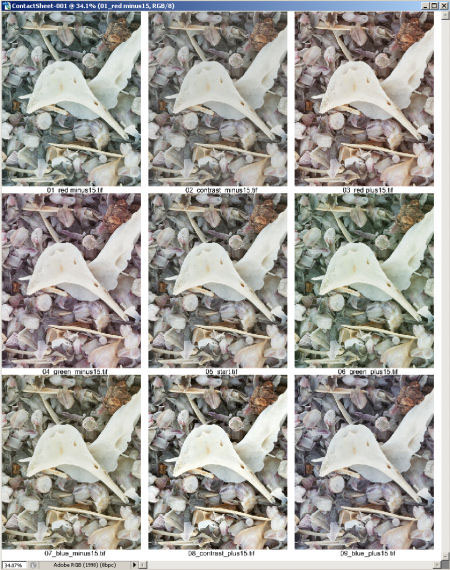
Printing a ring around is a traditional technique for evaluating
images in the wet color darkroom. I did it for my basic color
printing class. I did find the process useful, but much too
tedious to repeat for any images other than that particular
assignment. In the digital darkroom, this procedure is still
effective, but infinitely easier.
The ring around is designed to help evaluate if an image has
the appropriate color balance and/or density. (it can potentially
be used for a wide range of options; anything that can be placed
on an adjustment layer; we will be investigating more options
in the future). The basic ring around shows some variations of
an image for +R, +G, +B, -R, -G, -B, darker and lighter.
Use a Ring around:
•
when you have an image that you think looks great – but
just to test the final evaluation
•
when you have an image that you just can’t seem to color
balance well
It is important to remember that our eyes/brains will sometimes
compensate for color balance issues in an image to make it
appear better than it really is – take some time away
from an image (even a couple minutes) and return to it to
evaluate the
color. A ring around forces a better evaluation of color.
We actually automated the whole process a bit. The action we
provide helps to create a Ring - Around quite easily (sorry,
the action is for PC as we need to write to disk, but the action
is also a blue print for your own actions on the Mac).
Here is what this action does:
- We create a folder "C:\tmp\ring_around"
- Empty the folder
- Run the action
- Browse to the folder "C:\tmp\ring_around" in Bridge or the
PS File browser
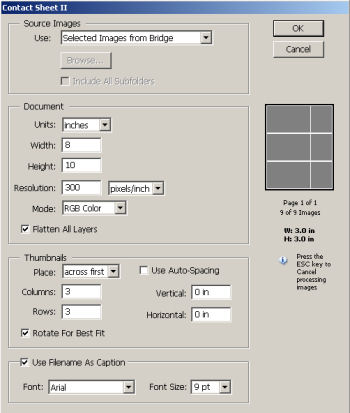
- Run the Contact Sheet II tool from Bridge

- Select a 3x3 matrix
- Enable filename as caption
- Confirm "ok"
- Then PS creates a one page proof sheet
- Print it with the correct profiles
We will soon also present a technique that uses variations to
improve images. The Ring - Around got us started.
|