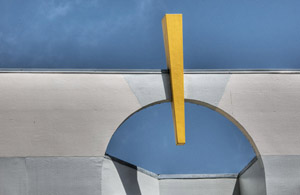
Walk Portfolios
What the heck do we call a "Walk Portfolio"? Normally we define a portfolio by things like:
- Theme
- Photographic style
- anything which can define a group of photographs
Over the last few months we we used a new style to capture photos. Here is what we do:
- Capture brackets of 3 shots to be HDR ready (learn more about HDR photography from here)
- Don't be bothered by harsh sun light
- Our sessions are defined by walking in certain areas/streets (right now mostly San Francisco)
- Use a certain style of post processing (with Tonemapping as a core element in the editing process)
- Most shots are captured handheld
We call it a "Walk" because that is actually what we do. We walk an area (e.g. streets) and photograph what we find. We have no pre-defined plans and try to open our eyes for what the scenery presents to us. We want to be surprised about what we find. This also means that we are very relaxed because we do not feel any sort of pressure to produce photos we like. Sometimes Bettina and I (Uwe) only use one camera. How that? We switch the camera back and forth. In other cases we use two or more cameras. Walking with minimal equipment allows us to concentrate on the "seeing" process.
This created the idea to present small portfolios that represent a single walk (or call it a session).
Here are some recent examples:
These "Walk Portfolios" are also very important for our new workshops:
 DOP HDR workshop: "Capture more Light" DOP HDR workshop: "Capture more Light"
These workshops actually teach how to capture scenes concentrating on exploring the local environment and not too much worrying about the current light. How that?
- By capturing multiple bracketed frames we have in many cases the photographic material to handle even more challenging light situations.
- The image capturing process is then complemented by post-processing techniques that allow us (and of course our students) to make the best out of this material.
Walk Portfolio #001: SF Walks #1

Skyscraper Reflections
We present here our first Walk Portfolio. Right now San Francisco is a prime location for this type of our photographic work. We also plan to present some sort of data that can be interesting for our readers. Please understand that we do not really talk about the detailed locations (this we reserve for our workshops). On the other side it is not hard to figure out. Key is that you try to explore the scene like a curious child and be open for everything that strikes your eyes.
Location: San Francisco
Location History: First time visit and all scenes for the first time photographed
Revisit planned: Yes, because we liked it a lot. There is a lot more to explore.
Weather: Sunshine with harsh shades
Photographers: Bettina + Uwe Steinmueller
Walk Duration: about 120 minutes net
Camera(s): Canon 1D Mark III
Lens(es): Canon 70-200mm f/4L IS, Canon 24-105mm f/4L IS
Images Taken: 142 x 3 bracketed exposures (426 RAW files)
Storage needed: 5.3 GB (the camera had 8+8 GB cards (CF and SD cards)
Time for post-processing: about 5-7 hours for an initial portfolio
Tools uses for Editing:
- Lightroom & Bridge
- Photoshop (with ACR 4.1)
- Photomatix (mainly CS3 plugin)
- LightZone 3.x for selective Relight
- Akvis Enhancer 7.0
- LensFix to correct Lens distortions
- Our own Tonality Tuning Kit 2.0 and EasyS Plus Sharpening 3.0 (yes, we use our own tools :-))
Important Techniques used:
- Merging to HDR
- Highlight Recovery
- Tonemapping / Relight
- Lens Correction
- Perspective corrections
- Photoshop layers
- Selective color tuning
- Blending of B&W and color (colorizing)
Here is our first draft of the "SF Walks #1" portfolio.
As mentioned before we will share in our workshops all the techniques we used to create these portfolios.
|