We use Akvis Enhancer for quite a while now. This article is about the use of Enhancer for B&W or colorized images. Enhancer pulls out details and also allows to re-map the tonal range for shadows and highlights.
1. We open the RAW file in Camera Raw 4.1.
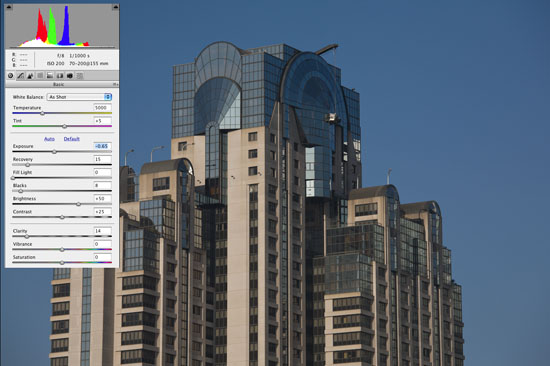
RAW file in ACR 4.1
We try to produce a very soft image without any clipping in the highlights and as little as possible in he shadows.
2. Once opened the file in Photoshop we run Enhancer on a new layer.
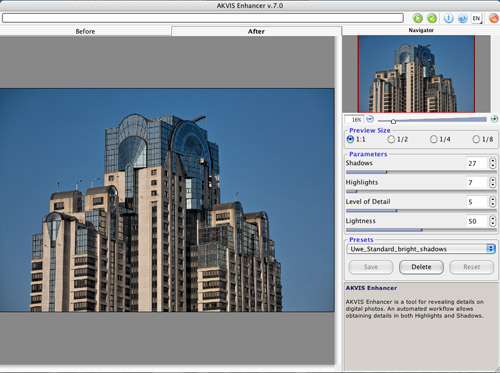
Enhancer
For this image we use the standard "Level of Detail" and try to open up she shadows.
3. Unfortunately Enhancer has a tendency to pull also fine details out of the sky (looks like strong grain).
Note: It will actually also show sensor dust spots that you hardly will notice without using Enhancer.
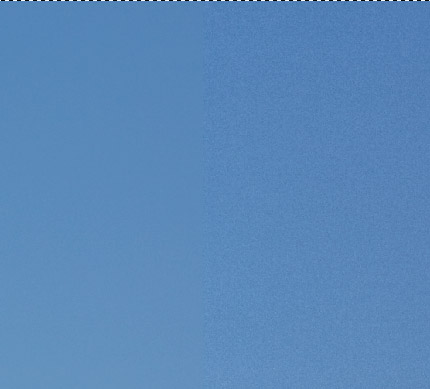
Sky grain (left without, right with Enhancer)
We solve this issue be creating a selection from the original image layer using Photoshop's "Color Range" tool:

Selected sky (and inverting the selection)
We apply this selection as a Layer Mask to the Enhancer layer. This way we avoid the grain in the sky.
4. Further fine tuning
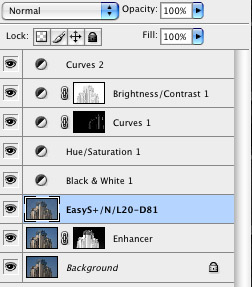
Final layer stack
- Sharpening layer (we use our EasyS Plus)
- CS3 B&W Adjustment Layer
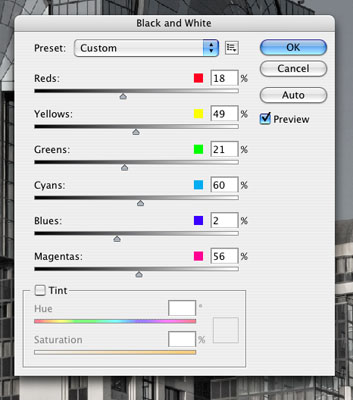
CS3 B&W Tool
- We get the colorizing effect by setting the B&W layer opacity to about 60-80%
- The Hue/Saturation layer desaturates the blue in the sky because we don't like blue sky in the colorized image.
- The first (from the bottom) Curves layer tunes some extreme specular highlights (using a narrow highlight Tonality Mask)
- Tuning the brightness and mainly contrast with a CS3 Brightness/Contrast Adjustment Layer. We also mask this layer with a wide Midtone Tonality Mask to avoid dense shadows and clipped highlights.
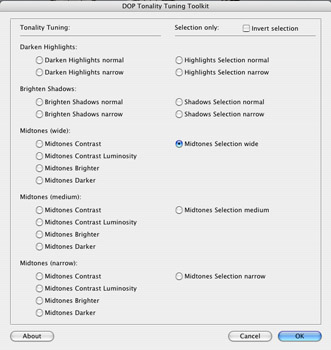
Creating a Midtone Selection
- The top Curves layer was used for some more global tonality tuning
5. With and without Enhancer
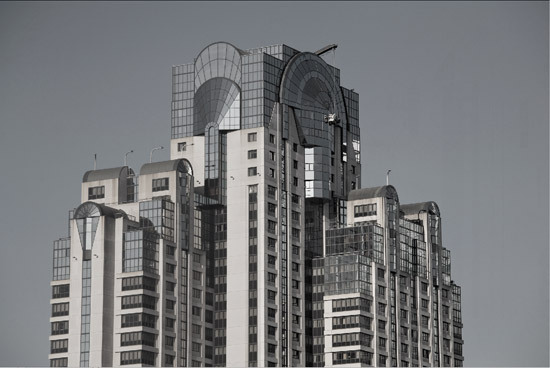
Same processing right without and left with Enhancer
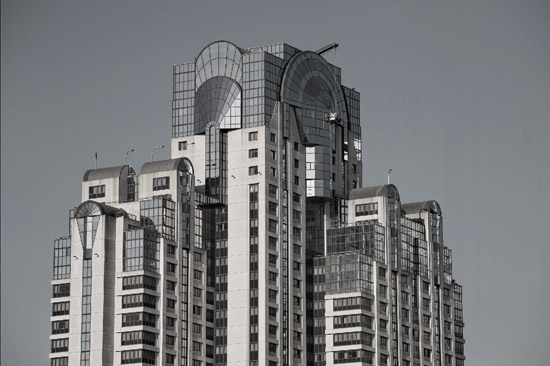
6. Final Version
Conclusion
Akvis Enhancer is a very useful tool for getting better local contrast and to brighten shadows also for B&W images.
Note: Why did we not create the B&W image directly in ACR or Lightroom?
- We could not have colorized the result
- But even more important is the fact that Enhancer would also have added the grain to the grayscale image and creating the same selection in B&W would be more challenging.
|